|
Size: 2426
Comment:
|
Size: 2652
Comment:
|
| Deletions are marked like this. | Additions are marked like this. |
| Line 26: | Line 26: |
| And a series of questions will pop up. This are detailed below. | Once installation is done, a series of questions will pop up to decide whether to configure DNS/DHCP or not. |
| Line 34: | Line 35: |
| Second, we need to specify the range of IP addresses that the Orchestra DHCP Server will manage. In our case scenario, we will use the range 192.168.1.100,192.168.1.200 as follows: | Second, we need to specify the range of IP addresses that the Orchestra DHCP Server will manage. In our case scenario, we will use the range '''192.168.1.100,192.168.1.200''' as follows: |
| Line 38: | Line 39: |
| Third, we specify the default gateway, which is not the Orchestra Server (tamarind is). | Third, we need to specify the default gateway, which is not the Orchestra Server ('''192.68.1.2'''). In our case is '''192.168.1.1'''. We do this as follows. |
| Line 42: | Line 43: |
| Finally, we specify the domain for DNS: | Finally, we need to input the Domain Name to be used in the environment, so we can make the machines resolve to a FQDN. We do this as follows: |
Overview
Orchestra is a set of components that provides a Provisioning server, Logging server, and Management server.
The Orchestra Provisioning Server provides the ability to manage both, DNS and DHCP in the network where we will using it to provision servers. This is very important to have specially when using Orchestra with JuJu.
In the Orchestra/JuJu scenario, it is important for JuJu to be able to access the DNS name of a machine that will be deployed. The recommended scenario is to allow Orchestra to manage DNS/DHCP for JuJu to be able to manage the environment correctly. The scenario requirenments for this is detailed bellow:
192.168.1.1: Default Gateway
192.168.1.2: Orchestra Server
192.168.1.100,192.168.1.200: IP address range to serve by the DHCP Server.
However, having an external DNS and DHCP server is also an option.
Installing Orchestra
To install the Orchestra Server, we simply need to execute the following command:
sudo apt-get install ubuntu-orchestra-server
Once installation is done, a series of questions will pop up to decide whether to configure DNS/DHCP or not.
Managing DNS/DHCP
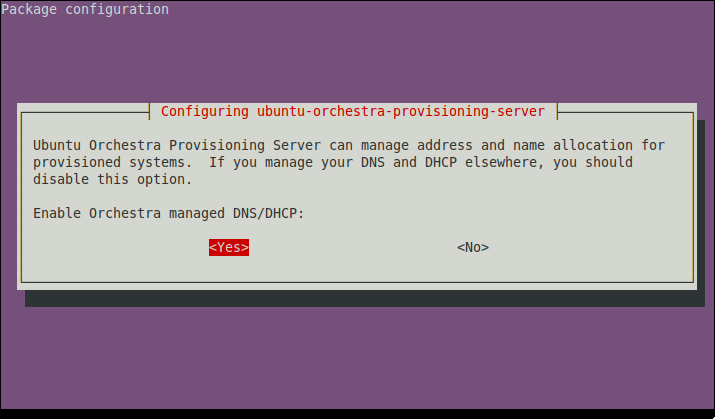
First, and right after the Orchestra Provisioning Server is installed, a question will pop-up asking to decide whether to manage DNS/DHCP or not. In this case, we select Yes, as follows:

Second, we need to specify the range of IP addresses that the Orchestra DHCP Server will manage. In our case scenario, we will use the range 192.168.1.100,192.168.1.200 as follows:

Third, we need to specify the default gateway, which is not the Orchestra Server (192.68.1.2). In our case is 192.168.1.1. We do this as follows.

Finally, we need to input the Domain Name to be used in the environment, so we can make the machines resolve to a FQDN. We do this as follows:

NOTE: Installing orchestra, will also run a script to import all the Ubuntu ISO's and create the necessary cobbler profiles for the systems that will be used for ensemble. In our case, the profile is:
- oneiric-x86_64-ensemble
The script will also create the management classes to be used by ensemble.
- orchestra-ensemble-available
- orchestra-ensemble-acquired